快速开始 更新于 2026年3月29日
快速开始
完成安装、登录、绑定 License 和连接 AI 模型,在 5 分钟内跑通 Agent for WhatsApp。
你将完成什么
这篇指南只解决一件事:让你在第一次安装后,尽快跑通完整链路。
完成后,你应该可以:
- 在浏览器里打开 Agent for WhatsApp 侧边栏
- 用 Google 登录账号
- 绑定有效的 License
- 接入至少一个 AI Provider
- 创建一条消息模板,或刷新一个客户的 AI 询盘分级
开始前准备
在开始安装之前,请确认你已经准备好以下内容:
- 浏览器:Chrome、Opera 或 Firefox
- Google 账号:建议使用你准备长期使用的账号
- License Key:如果你需要付费功能
- AI Provider Key:至少一个可用的 OpenAI、OpenRouter 或 Groq API Key
[!TIP] 如果你现在只想快速验证产品是否工作,可以先接入一个最熟悉的模型提供商,不需要一开始就配置多家。
上线流程
步骤 1 · 安装扩展
从浏览器商店安装 Agent for WhatsApp,并把图标固定到工具栏。
步骤 2 · 打开 WhatsApp Web
进入 WhatsApp Web,点击扩展图标,打开右侧工作台。
步骤 3 · 登录与绑定
用 Google 登录,进入账号页绑定 License。
步骤 4 · 连接 AI
在 Connector 页面填写 API Key,完成模型接入。
步骤 1:安装扩展
从浏览器商店安装扩展后,建议把图标固定到浏览器顶部工具栏。这样你在 WhatsApp Web 里可以一键打开侧边栏,而不用每次重新查找扩展菜单。
建议固定扩展图标,后续会频繁从这里打开侧边栏。
步骤 2:打开侧边栏
访问 WhatsApp Web,点击扩展图标,打开 Agent for WhatsApp 的侧边栏。
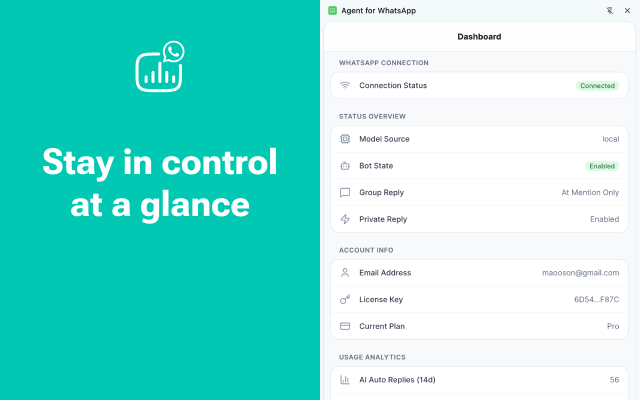
这一步完成后,你应该能看到:
- 当前账号状态
- Connector 配置入口
- 线索管理、批量发送、定时消息等工具入口
如果点击图标没有打开侧边栏,优先检查:
- 你是否已经安装的是最新版本
- 浏览器是否禁用了扩展权限
- 当前页面是否就是 WhatsApp Web
步骤 3:Google 登录与绑定 License
Google 登录和 License 绑定是两件事:
- Google 登录:确认你是谁
- License 绑定:确认你购买了什么功能
首次使用时,建议先完成 Google 登录,再立刻绑定 License。这样后续换设备时,系统更容易自动识别你的付费状态。

在账号页面输入激活码并完成绑定,付费功能会立即解锁。
步骤 4:连接 AI Provider
进入 Connector 设置后,至少接入一个可用 Provider:
OpenAI:稳定,适合通用场景OpenRouter:模型选择多Groq:速度快,适合轻量任务Local:适合本地推理或隐私优先场景
推荐先做一个最小验证:
- 保存 API Key
- 回到客户详情页
- 手动点击一次
刷新分级
如果能返回结构化结果,说明模型链路已经跑通。
如何确认配置成功
建议用下面这 4 项做验收:
- 账号页显示已登录
- 账号页能看到正确的套餐状态
- 消息模板可以正常保存
- AI 询盘分级或结构化线索可以成功返回结果
下一步推荐
完成快速开始后,建议继续看这三篇:
[!IMPORTANT] 不要在第一次安装后同时测试所有功能。先跑通登录、绑定和一个 AI 工作流,再逐步启用批量发送和定时消息,成功率最高。